
Can't see the region you're looking for? You can find a list of our global locations here
When told that a floor or wall sheet has failed, our technical team try to find out why, and how we can help sort the problem. On occasions, when we take a close look at these installations, the culprit is a problem with the subfloor or substrate.
We’re often told there isn’t one magic solution to a problem; well in this case there are several. Whether specifying or fitting floors, the following could help avoid problems right at the start.
Let’s take a look at floors first. Subfloor types generally fall into three categories: concrete, wood and specials.
First: identify the subfloor you are dealing with. The following guidance is for concrete as this is the most common. Concrete subfloors could be within a new-build or a refurbishment, so we’ll cover both. If you’re dealing with calcium sulphate, please speak with your Altro Consultant, or call the technical helpline on 01462 489516 to make sure you get the right guidance.
Regardless of the type of subfloor and how old the building is, the golden rule that can head off a host of problems and potentially save you money is: test for damp. You would be amazed at how often no reading is taken, or wires are crossed and an installer gets the green light to install the floor, yet no one has actually tested for damp.
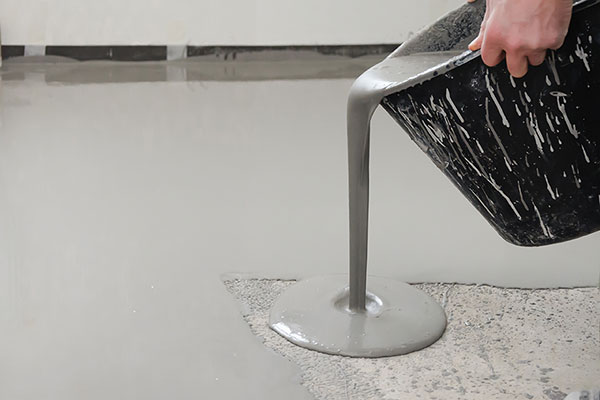
As a rough rule of thumb, new power-floated subfloors will dry at approximately 1mm per day, but can take far longer, so always test for moisture, ensuring that the reading is 75% relative humidity (RH), or below, before installing the new floor. Don’t let anyone push you into installing any sooner, unless the reading is right – I find it’s best to do the reading yourself so that you can be absolutely sure.
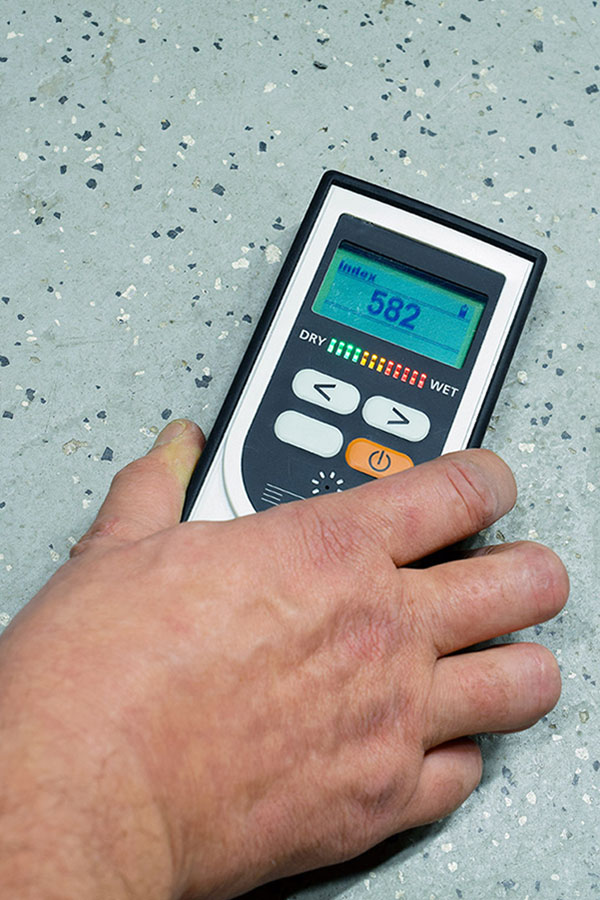
A reliable hygrometer or Protimeter doesn’t have to break the bank but an investment here could save you a lot of money long term.
Some meters use a traffic light system to give an indication of the presence of moisture, but on cementitious subfloors, an electronic or air hygrometer will be needed to record a truly accurate assessment of the level of relative humidity present.
If you’re regularly testing both floors and walls, there are meters that can do both available.
When you take an RH reading for the floor and it’s 75% or less, go ahead. If the reading is over 75%, there are a number of options available to you - please consult Altro technical services for guidance.
If you’re dealing with a refurb rather than a new build, inspect the old floor before you remove it. If it shows signs of damp issues then pull up the floor and take a good look at the subfloor.
Before 1970, damp proof membranes (DPMs) were not mandatory, making the damp reading even more important. The relative humidity (RH) reading will indicate how you should proceed and, if above 75%, a surface DPM should always be applied.
Whatever the reading you may have to cover old adhesives, so it’s important that you choose a levelling compound that’s suitable to cover them. Your chosen levelling compound supplier will have guidance on what’s best to use in each case.
Our adhesive-free floors can be laid up to 97% RH, and with no adhesive and no DPM required it can also save you time and money. They’re designed to lay flat and hold just as effectively as an Altro floor installed using adhesive. Take a look at Altro XpressLay, Altro Cantata, Altro Wood adhesive-free and Altro Stronghold 30 adhesive-free to find out more.
If your damp subfloor is in an area where a specialist floor is needed, such as a kitchen or a wet environment, you can apply a DPM, such as Altro Proof. If the subfloor is uneven use a moisture tolerant smoothing compound at sufficient depth to provide a smooth flat surface to receive the surface DPM. If you feel that following the application of the Altro Proof that the surface is still too uneven, a subsequent application of smoothing compound should be applied. Once the Altro Proof has been applied and allowed to cure and you are happy with the result, the new flooring can be installed direct, using a two-part adhesive for commercial kitchens, wet or heavy-duty installations. A pressure sensitive adhesive can be used for dry general circulation areas. Make sure the adhesive you use can cope with moisture and off you go: if you don’t use a moisture-tolerant levelling compound on a damp subfloor, it’s a bit like when you take a plaster off your finger and it goes wrinkly - the moisture has been drawn out of your skin, the same thing will happen to the smoothing compound and it could fail.
Altro Everlay A or B can also be used where RH levels are above 75% and an adhesive-free floor is not an option. Once loose-laid to a smooth subfloor, another more suitable Altro flooring can then be adhered to the surface of the Altro Everlay, using AltroFix 19 Plus two-part adhesive.
At 4mm thick, Altro Everlay B offers extra underfoot comfort for staff and additional sound absorption, should this be a requirement. If you choose this option, make sure you use our AltroFix 19 Plus adhesive for this type of installation, as this has been designed specifically for use with Altro Everlay.

We’ve all seen the signs: split joints, blisters in the floor and a musty smell. In extreme cases the floor can also stain from damp being drawn up into it and unfortunately there is no quick fix. The only solution is to take it up and start again.
If this means disconnecting equipment, moving people out, causing a business loss of earnings, your time to strip it all out, treat the subfloor and re-lay, plus material costs, it could be very expensive. But I hope I’ve shown you that a damp subfloor doesn’t have to cause problems as long as you know it’s there, and finding out is simple.
So, onto walls – and I imagine it won’t surprise you to learn that a damp wall can cause just as much of a headache as a damp subfloor and that it’s just as simple to avoid!
Again, testing for damp is the key. If you put a wall sheet on a damp wall, it will prevent any moisture from escaping – it will gather under the sheet, causing the adhesive to fail and the sheet will come away. It can also force the moisture away from that side of the wall and out the other side, appearing as though there’s a leak or similar serious issue when there isn’t. If the wall sheet starts to fail it means voids will be created, potentially allowing moisture, bacteria and bugs in, so the right prep is vital, not only to avoid problems generally, but in particular for hygienic spaces such as hospitals and food preparation areas.

Moisture in walls is measured differently to that in the subfloor. You’re looking for the wood moisture equivalent (WME) and a reading of 16% on a Protimeter, or less.
The signs could already be there before you take a reading: condensation is a good indicator of damp. And if you have already identified a damp floor, there’s a possibility that the walls could have the same issue. On the flip side, if you are looking at the wall first and your reading is over 16% WME, it’s best practice to check the floor too – it could save you problems in the long run, and potentially help you identify the source of the problem.

Before you install a walls system, the substrate must be dry – there’s no damp proofing system; it’s all about the substrate. That could be one of several types: paint, plaster, tiles or an existing wall sheet.
One of the real advantages of installing a wall sheet is that it can go over what’s already there – it’s a great way of making a space look great, with a quick installation time. It’s still important to check the state of the existing wall though, for example, if there’s damp on the wall behind tiles, it has an escape route through any gaps in the grout; the very reason why tiles aren’t truly hygienic solutions.
With paint, the signs of damp are more obvious with bubbling and/or cracks. If this moisture escape is ignored and a wall sheet is placed on the top, you will be bonding to an existing weak point, the moisture will sit under the sheet, and it will eventually fail.
Even with the right reading, if your substrate is porous, we always recommend a moisture-tolerant two-part adhesive, and this is particularly important in kitchens and bathrooms – areas where moisture is ever-present.
It’s simple to dry out a wall. A dehumidifier is best, combined with time - but you can use gentle heating to speed up the process. Don’t be tempted to blast the area with heat – concentrated heat could damage your substrate. When using a heater, my top tip is to go electric! An electric heater produces dry heat. A gas heater actually produces ‘wet’ heat and won’t solve the issue, which would be clear once you take a damp reading – so it’s still really important to take a reading, even if you’re taking steps to dry out the wall.
If you’re working on an older building and you persistently get a damp reading, you need to isolate the problem. It could be that there’s no cavity in the wall and the side facing the outside is drawing moisture in. Once you’ve identified the damp source, you can decide how to move forward.
Even in a new building, if you can’t get the damp reading below 16%, it’s an indicator of a problem that will need investigating, a leak for example.
Something else I’ve come across is that, with the increase in modular builds, sometimes the different components are transported and stored in all weathers – and in this country that will mean a fair amount of rain, so it’s important to ensure these are dry before work starts.
If a damp substrate has caused your wall sheet to fail, the only solution is to remove the wall sheets and dry the wall out. This does mean removing adhesive from both the substrate and the wall sheet, which isn’t the easiest of jobs, particularly if you damage the substrate and need to make it good. As usual, the right prep saves hassle in the long run.
Don’t forget we’re always here at the end of the phone if you have any questions about what we’ve covered here
Just :
Until next time!